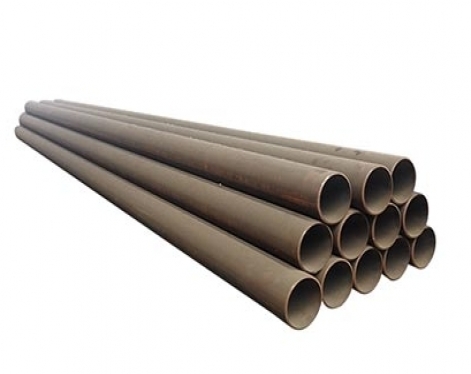
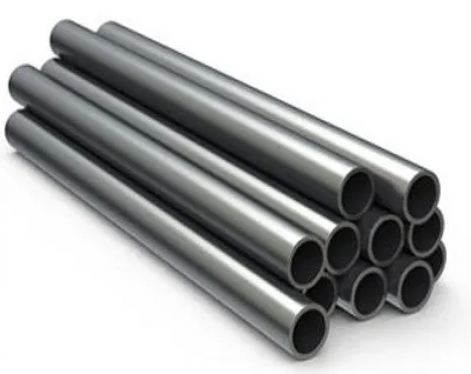
Non-destructive testing (NDT) is crucial to ensuring the quality of non-standard seamless pipes, even more important than for standard seamless steel pipes. This is because the particularity of non-standard steel pipes determines that their quality control faces greater challenges. Nansteel Manufacturing Co., Ltd carefully summarizes the importance of non-destructive testing in the quality assurance of non-standard seamless steel pipes:
Quality risks of non-standard seamless steel pipes
Large dimensional deviation: Since it is non-standard customization, the dimensional tolerance may be larger than that of standard steel pipes, and it is more likely to have dimensional deviation problems, affecting subsequent processing and use.
Special materials: The use of special materials or composition adjustments may make process control during smelting and rolling more difficult and more prone to internal defects.
High performance requirements: Non-standard steel pipes are often used in special working conditions and have higher performance requirements. Any potential defects may lead to serious safety accidents.
Insufficient production experience: Manufacturers may have relatively insufficient experience in producing non-standard steel pipes, making quality problems more likely to occur.

The importance of nondestructive testing for non-standard smls pipes
1. Reduce safety risks: Discovering potential defects through non-destructive testing can effectively reduce the risk of safety accidents such as breakage and leakage of steel pipes during use.
2. Improve product reliability: Non-destructive testing can ensure that the quality of non-standard steel pipes meets the requirements and improve product reliability and service life.
3. Reduce economic losses: By conducting non-destructive testing during the production process, defective products can be discovered and eliminated in a timely manner, reducing rework and scrap losses caused by quality problems.
4. Meeting special application requirements: Some special application fields, such as aerospace, nuclear power, etc., have extremely high quality requirements for steel pipes and must undergo strict non-destructive testing.
Common nondestructive testing methods
1. Ultrasonic testing uses the propagation characteristics of ultrasound in different media. When ultrasound encounters defects, reflection, refraction and scattering will occur. By analyzing the reflected sound wave signal, defects inside the steel pipe, such as cracks, pores, inclusions, etc., can be accurately detected. It is like doing a "B-ultrasound" for the steel pipe, which can clearly see the internal condition. This method is suitable for non-standard seamless steel pipes of various thicknesses, especially for thick steel pipes, the detection effect is remarkable. However, it also has certain limitations. It is difficult to inspect workpieces with complex shapes, and the judgment of the inspection results requires a high level of experience from the inspectors.
2. Magnetic particle testing is mainly suitable for non-standard seamless steel pipes made of ferromagnetic materials. It uses the characteristics of the leakage magnetic field at the defect to adsorb magnetic particles, making the surface and near-surface defects nowhere to hide. During the inspection, a magnetic field is first applied to the steel pipe to magnetize it, and then magnetic powder is sprayed on the surface. If there is a defect, the leakage magnetic field at the defect will attract the magnetic powder, forming an obvious magnetic mark, thus clearly showing the location, shape and size of the defect. This method is often used to detect defects such as cracks, folds, and hairlines on the surface of steel pipes. It has the advantages of high detection sensitivity, simple operation, and fast detection speed. But it can only detect ferromagnetic materials and is powerless against non-ferromagnetic materials.
3. Eddy current testing is based on the principle of electromagnetic induction. When an alternating current is passed through the detection coil, an alternating magnetic field is generated on the surface of the non-standard seamless steel pipe, and eddy currents are induced in the steel pipe. If there are defects on the surface or near the surface of the steel pipe, the distribution and size of the eddy current will change. By detecting this change, the defect can be found. This method is suitable for seamless steel pipes made of conductive materials. In practical applications, it is often used to detect defects such as cracks, pits, holes, etc. on the surface of steel pipes. It has a fast detection speed and can realize automated detection and rapid screening of steel pipes on the production line. However, it is difficult to judge the depth and shape of defects, and it is easily affected by factors such as material unevenness.
4. Radiographic testing uses rays (such as X-rays and γ-rays) to penetrate non-standard seamless steel pipes, and determines whether there are defects inside based on the different attenuation levels of the rays in different media. When the radiation passes through a steel pipe with defects, the defective part has a different ability to absorb radiation than the surrounding normal material, and different images will be formed on the X-ray film, thus intuitively showing the location and shape of the defect. This method can accurately detect internal defects such as pores, slag inclusions, and incomplete penetration, and is often used to detect steel pipes with extremely high quality requirements. However, X-ray detection equipment is expensive, the operation process is complicated, and the radiation is harmful to the human body, requiring strict protective measures and professional operators.
Reasonable choice to maximize the detection effect
Each of the above-mentioned commonly used non-destructive testing methods has its unique advantages and scope of application, but also has certain limitations. In practical applications, in order to ensure the comprehensive and accurate quality inspection of non-standard seamless steel pipes, it is necessary to comprehensively select appropriate inspection methods based on various factors such as the material, specification, and defect type of the steel pipe. Sometimes, it is even necessary to combine multiple inspection methods.
Read more: Non-standard Seamless Pipe Meaning, Characteristics and Application
Quality risks of non-standard seamless steel pipes
Large dimensional deviation: Since it is non-standard customization, the dimensional tolerance may be larger than that of standard steel pipes, and it is more likely to have dimensional deviation problems, affecting subsequent processing and use.
Special materials: The use of special materials or composition adjustments may make process control during smelting and rolling more difficult and more prone to internal defects.
High performance requirements: Non-standard steel pipes are often used in special working conditions and have higher performance requirements. Any potential defects may lead to serious safety accidents.
Insufficient production experience: Manufacturers may have relatively insufficient experience in producing non-standard steel pipes, making quality problems more likely to occur.

The importance of nondestructive testing for non-standard smls pipes
1. Reduce safety risks: Discovering potential defects through non-destructive testing can effectively reduce the risk of safety accidents such as breakage and leakage of steel pipes during use.
2. Improve product reliability: Non-destructive testing can ensure that the quality of non-standard steel pipes meets the requirements and improve product reliability and service life.
3. Reduce economic losses: By conducting non-destructive testing during the production process, defective products can be discovered and eliminated in a timely manner, reducing rework and scrap losses caused by quality problems.
4. Meeting special application requirements: Some special application fields, such as aerospace, nuclear power, etc., have extremely high quality requirements for steel pipes and must undergo strict non-destructive testing.
Common nondestructive testing methods
1. Ultrasonic testing uses the propagation characteristics of ultrasound in different media. When ultrasound encounters defects, reflection, refraction and scattering will occur. By analyzing the reflected sound wave signal, defects inside the steel pipe, such as cracks, pores, inclusions, etc., can be accurately detected. It is like doing a "B-ultrasound" for the steel pipe, which can clearly see the internal condition. This method is suitable for non-standard seamless steel pipes of various thicknesses, especially for thick steel pipes, the detection effect is remarkable. However, it also has certain limitations. It is difficult to inspect workpieces with complex shapes, and the judgment of the inspection results requires a high level of experience from the inspectors.
2. Magnetic particle testing is mainly suitable for non-standard seamless steel pipes made of ferromagnetic materials. It uses the characteristics of the leakage magnetic field at the defect to adsorb magnetic particles, making the surface and near-surface defects nowhere to hide. During the inspection, a magnetic field is first applied to the steel pipe to magnetize it, and then magnetic powder is sprayed on the surface. If there is a defect, the leakage magnetic field at the defect will attract the magnetic powder, forming an obvious magnetic mark, thus clearly showing the location, shape and size of the defect. This method is often used to detect defects such as cracks, folds, and hairlines on the surface of steel pipes. It has the advantages of high detection sensitivity, simple operation, and fast detection speed. But it can only detect ferromagnetic materials and is powerless against non-ferromagnetic materials.
3. Eddy current testing is based on the principle of electromagnetic induction. When an alternating current is passed through the detection coil, an alternating magnetic field is generated on the surface of the non-standard seamless steel pipe, and eddy currents are induced in the steel pipe. If there are defects on the surface or near the surface of the steel pipe, the distribution and size of the eddy current will change. By detecting this change, the defect can be found. This method is suitable for seamless steel pipes made of conductive materials. In practical applications, it is often used to detect defects such as cracks, pits, holes, etc. on the surface of steel pipes. It has a fast detection speed and can realize automated detection and rapid screening of steel pipes on the production line. However, it is difficult to judge the depth and shape of defects, and it is easily affected by factors such as material unevenness.
4. Radiographic testing uses rays (such as X-rays and γ-rays) to penetrate non-standard seamless steel pipes, and determines whether there are defects inside based on the different attenuation levels of the rays in different media. When the radiation passes through a steel pipe with defects, the defective part has a different ability to absorb radiation than the surrounding normal material, and different images will be formed on the X-ray film, thus intuitively showing the location and shape of the defect. This method can accurately detect internal defects such as pores, slag inclusions, and incomplete penetration, and is often used to detect steel pipes with extremely high quality requirements. However, X-ray detection equipment is expensive, the operation process is complicated, and the radiation is harmful to the human body, requiring strict protective measures and professional operators.
Reasonable choice to maximize the detection effect
Each of the above-mentioned commonly used non-destructive testing methods has its unique advantages and scope of application, but also has certain limitations. In practical applications, in order to ensure the comprehensive and accurate quality inspection of non-standard seamless steel pipes, it is necessary to comprehensively select appropriate inspection methods based on various factors such as the material, specification, and defect type of the steel pipe. Sometimes, it is even necessary to combine multiple inspection methods.
Read more: Non-standard Seamless Pipe Meaning, Characteristics and Application


