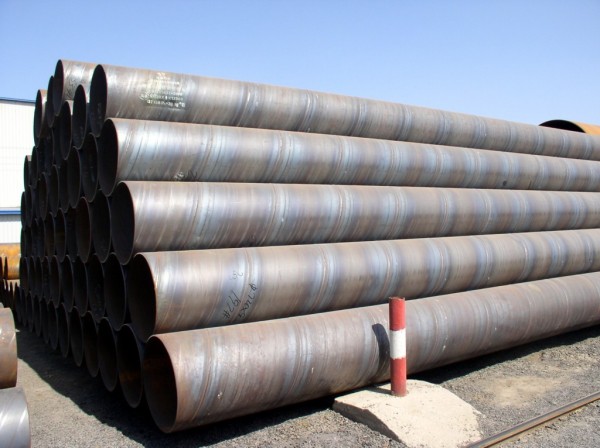
The control measures for the welding quality of ssaw steel pipes are mainly pre-control and in-process control.
1. prior control
The work content of prior control includes: construction plan formulation and review, welder qualification and ability verification, welding equipment verification, construction material inspection, etc.
First, the construction unit formulates a special welding construction plan and operation instructions, and the supervision unit conducts a detailed review and approval.
Secondly, the supervision unit will verify the qualifications of the welders to see if they hold a welder qualification certificate that is still within the validity period, and the welding categories listed in the certificate correspond to the requirements of the project, and check whether the welding equipment meets the requirements of the technical specifications.The owner hired industry experts to test the welding ability of the incoming welders, and only those who passed the test were allowed to carry out actual welding work.
The supervision unit checks the spiral steel pipe and welding materials. The check content of the pipe material includes whether the material certificate is complete, whether the pipe material identification such as heat number, batch number, specification, etc. corresponds to the material certificate, and whether the inspection record of the pipe material warehouse is complete.The inspection of the geometric dimensions of the steel pipe does not meet the requirements of the disposal method, and it is clearly marked;The contents of the data verification of welding materials include complete specifications of welding materials, factory certificate and furnace batch number, complete procedures for personnel warehouse and delivery, and sampling re-inspection records.

2. In-the-moment control
In the welding process, a professional construction plan should be implemented to ensure a qualified welding environment, and the construction should be carried out in strict accordance with the operation instructions. When the pipe is placed in the groove, it should not be directly bundled with steel wire rope to avoid scratches on the surface of the pipe, and it should be placed on the pipe frame to be stable, and non-metallic gaskets should be used for cushioning.
Before welding assembly, remove oil, paint, scale, rust, burr and galvanized layer on the groove and its inner and outer surfaces within a range of not less than 10mm, without cracks, interlayers and other defects.Clean with a spiral steel tube brush and acetone when removing. After the groove is processed by the hot working method, the oxide scale and slag on the groove surface are removed, and the unevenness is ground flat. The groove processing adopts electric groove machining or lathe turning.
Within the range of 100mm on each side of the groove of the ssaw steel pipe weldment, measures are taken to prevent the welding spatter from contaminating the surface of the weldment before welding. The welding rod and flux are dried according to regulations before use, and kept dry during use.The surface of the welding wire is cleaned of oil, rust, etc. before use. The welded seam is instinctively washed and passivated.
The welding inspector of the construction unit shall inspect the appearance quality of the weld, check the forming state of the weld, and check whether the surface color has any defects such as undercut, misalignment, pit, splash, etc.And make inspection records for each process, including the location of the weld and the record of the welder's number, the inspection record of the weld groove and the gap between the counterparts, the inspection record of the geometric dimensions of the weld, and the inspection record of the appearance quality of the weld.The side station supervisor of the supervision unit shall inspect and spot check the key processes, including the inspection of the steel pipe counterpart, whether the groove is stained, gapped, arc burns, or water stains.The roundness of the nozzle, the deviation of the diameter, the gap between the counterparts, the amount of misalignment, etc.
1. prior control
The work content of prior control includes: construction plan formulation and review, welder qualification and ability verification, welding equipment verification, construction material inspection, etc.
First, the construction unit formulates a special welding construction plan and operation instructions, and the supervision unit conducts a detailed review and approval.
Secondly, the supervision unit will verify the qualifications of the welders to see if they hold a welder qualification certificate that is still within the validity period, and the welding categories listed in the certificate correspond to the requirements of the project, and check whether the welding equipment meets the requirements of the technical specifications.The owner hired industry experts to test the welding ability of the incoming welders, and only those who passed the test were allowed to carry out actual welding work.
The supervision unit checks the spiral steel pipe and welding materials. The check content of the pipe material includes whether the material certificate is complete, whether the pipe material identification such as heat number, batch number, specification, etc. corresponds to the material certificate, and whether the inspection record of the pipe material warehouse is complete.The inspection of the geometric dimensions of the steel pipe does not meet the requirements of the disposal method, and it is clearly marked;The contents of the data verification of welding materials include complete specifications of welding materials, factory certificate and furnace batch number, complete procedures for personnel warehouse and delivery, and sampling re-inspection records.

2. In-the-moment control
In the welding process, a professional construction plan should be implemented to ensure a qualified welding environment, and the construction should be carried out in strict accordance with the operation instructions. When the pipe is placed in the groove, it should not be directly bundled with steel wire rope to avoid scratches on the surface of the pipe, and it should be placed on the pipe frame to be stable, and non-metallic gaskets should be used for cushioning.
Before welding assembly, remove oil, paint, scale, rust, burr and galvanized layer on the groove and its inner and outer surfaces within a range of not less than 10mm, without cracks, interlayers and other defects.Clean with a spiral steel tube brush and acetone when removing. After the groove is processed by the hot working method, the oxide scale and slag on the groove surface are removed, and the unevenness is ground flat. The groove processing adopts electric groove machining or lathe turning.
Within the range of 100mm on each side of the groove of the ssaw steel pipe weldment, measures are taken to prevent the welding spatter from contaminating the surface of the weldment before welding. The welding rod and flux are dried according to regulations before use, and kept dry during use.The surface of the welding wire is cleaned of oil, rust, etc. before use. The welded seam is instinctively washed and passivated.
The welding inspector of the construction unit shall inspect the appearance quality of the weld, check the forming state of the weld, and check whether the surface color has any defects such as undercut, misalignment, pit, splash, etc.And make inspection records for each process, including the location of the weld and the record of the welder's number, the inspection record of the weld groove and the gap between the counterparts, the inspection record of the geometric dimensions of the weld, and the inspection record of the appearance quality of the weld.The side station supervisor of the supervision unit shall inspect and spot check the key processes, including the inspection of the steel pipe counterpart, whether the groove is stained, gapped, arc burns, or water stains.The roundness of the nozzle, the deviation of the diameter, the gap between the counterparts, the amount of misalignment, etc.


