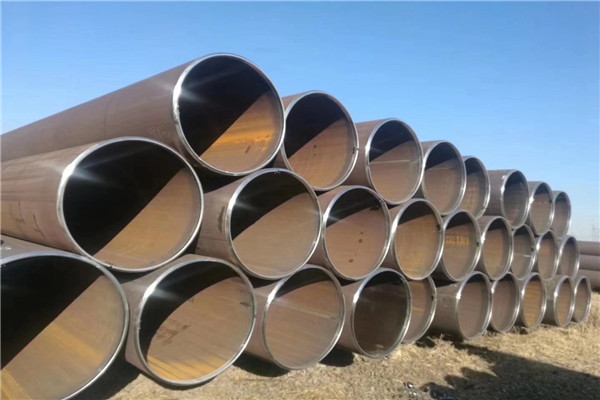
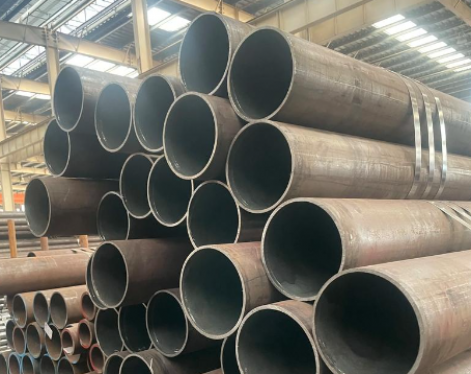
LSAW pipe is a welded pipe made from a single medium-thick plate, pressed (rolled) into a tube billet in a mold or forming machine, and double-sided submerged arc welding and expansion.
The main process of LSAW pipe includes
1. Plate inspection: After the steel plate enters the production line, the whole plate is firstly inspected by ultrasonic.
2. Edge milling: use the edge milling machine to perform double-sided edge milling on both edges of the steel plate to make it meet the required plate width, parallelism of the two plate edges and groove shape.
3. Pre-bending: Use a pre-bending machine to pre-bend the edge of the plate so that the edge of the plate has the same curvature as the steel pipe.
4. Forming: After multiple step-by-step stamping on the JCO forming machine, first half of the steel plate is pressed into a "J" shape. Then press the other half of the steel plate into a "J" shape to form a "C" shape, and finally pressurize from the middle to form an open "O" shape tube blank.
5. Pre-welding: Make the formed steel pipes seam together and use mixed gas shielded welding for continuous welding.

6. Internal welding: Three sets of multi-wire (up to four wire) serial submerged arc welding are used to weld the inner side of the steel pipe at the same time.
7. External welding: Two sets of four-wire welding are used to weld the outer side of the steel pipe at the same time.
8. Ultrasonic flaw detection I: inspect the defects of the internal and external welds after welding.
9. X-ray flaw detection I: 100% full weld inspection of the welds after internal and external welding.
10. Overall mechanical expansion: it can effectively improve the diameter, roundness and straightness precision of the steel pipe, and can improve the 11. uniformity of internal stress distribution. In this way, the damage caused by stress corrosion is avoided, and at the same time, it is beneficial to the welding construction on site.
12. Hydrostatic test: The enlarged steel pipes are inspected one by one on the hydraulic machine to ensure that the steel pipes meet the test pressure required by the standard, with automatic recording and storage functions.
13. Chamfering: Chamfering the pipe end of the qualified steel pipe to process the pipe end size required by the user.
14. Ultrasonic inspection Ⅱ: Conduct ultrasonic inspection one by one again to check the defects of steel pipes after diameter expansion and water pressure.
15. X-ray flaw detection II: X-ray flaw detection is carried out one by one again to check the defects of steel pipes after diameter expansion and water pressure, and it has image processing function, and can also take pictures of pipe ends.
The main process of LSAW pipe includes
1. Plate inspection: After the steel plate enters the production line, the whole plate is firstly inspected by ultrasonic.
2. Edge milling: use the edge milling machine to perform double-sided edge milling on both edges of the steel plate to make it meet the required plate width, parallelism of the two plate edges and groove shape.
3. Pre-bending: Use a pre-bending machine to pre-bend the edge of the plate so that the edge of the plate has the same curvature as the steel pipe.
4. Forming: After multiple step-by-step stamping on the JCO forming machine, first half of the steel plate is pressed into a "J" shape. Then press the other half of the steel plate into a "J" shape to form a "C" shape, and finally pressurize from the middle to form an open "O" shape tube blank.
5. Pre-welding: Make the formed steel pipes seam together and use mixed gas shielded welding for continuous welding.

6. Internal welding: Three sets of multi-wire (up to four wire) serial submerged arc welding are used to weld the inner side of the steel pipe at the same time.
7. External welding: Two sets of four-wire welding are used to weld the outer side of the steel pipe at the same time.
8. Ultrasonic flaw detection I: inspect the defects of the internal and external welds after welding.
9. X-ray flaw detection I: 100% full weld inspection of the welds after internal and external welding.
10. Overall mechanical expansion: it can effectively improve the diameter, roundness and straightness precision of the steel pipe, and can improve the 11. uniformity of internal stress distribution. In this way, the damage caused by stress corrosion is avoided, and at the same time, it is beneficial to the welding construction on site.
12. Hydrostatic test: The enlarged steel pipes are inspected one by one on the hydraulic machine to ensure that the steel pipes meet the test pressure required by the standard, with automatic recording and storage functions.
13. Chamfering: Chamfering the pipe end of the qualified steel pipe to process the pipe end size required by the user.
14. Ultrasonic inspection Ⅱ: Conduct ultrasonic inspection one by one again to check the defects of steel pipes after diameter expansion and water pressure.
15. X-ray flaw detection II: X-ray flaw detection is carried out one by one again to check the defects of steel pipes after diameter expansion and water pressure, and it has image processing function, and can also take pictures of pipe ends.


