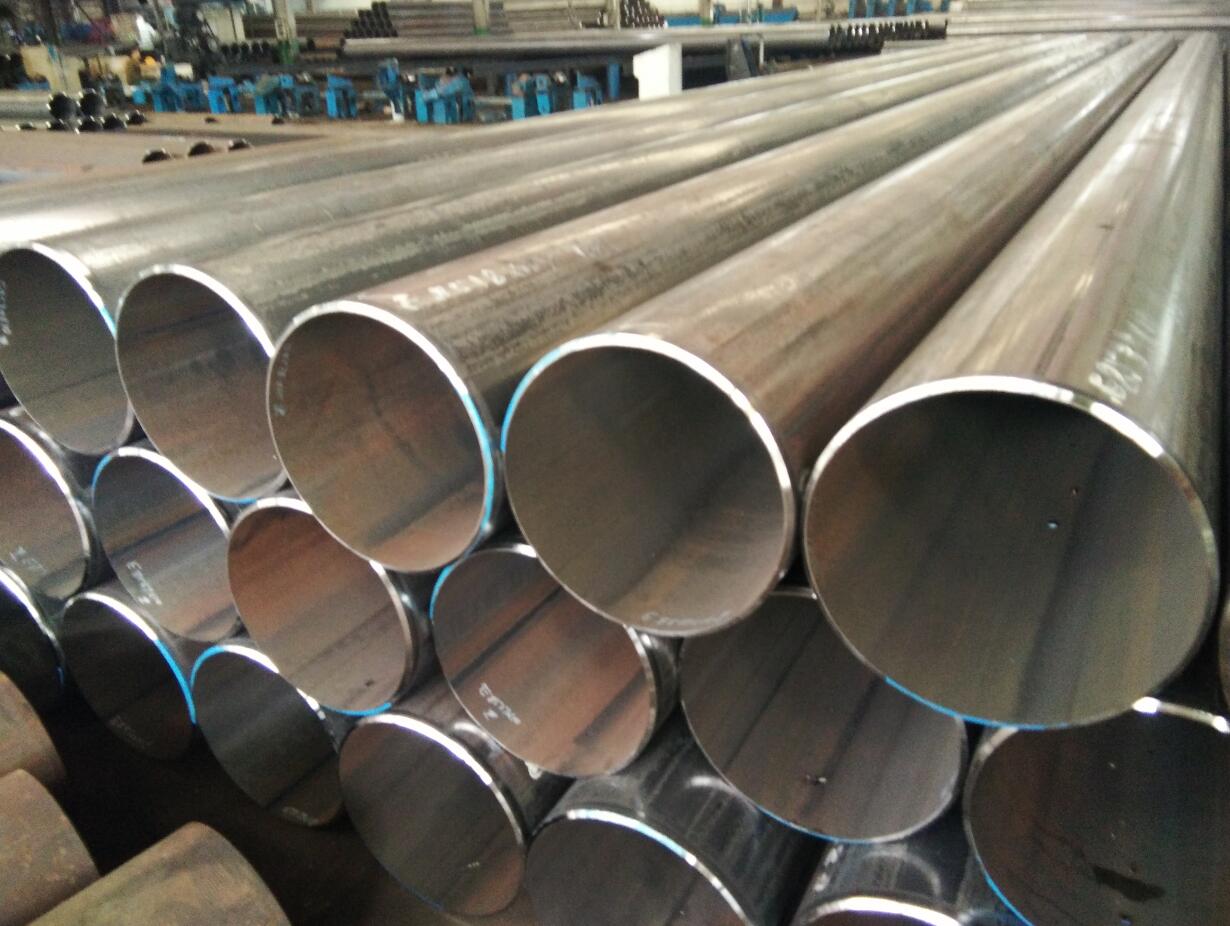
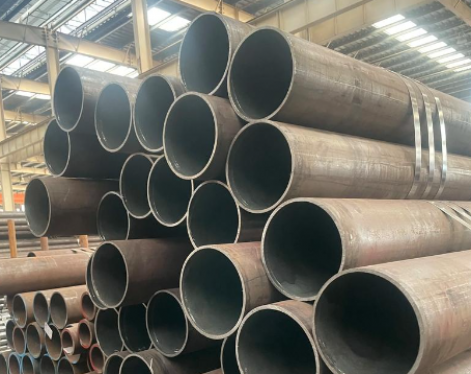
ERW pipe is made by using the skin effect and proximity effect of high-frequency current to rapidly heat the edge of the pipe to the welding temperature and then extrude and weld it. Compared with seamless steel pipes, ERW pipes have the advantages of high dimensional accuracy, low price and high production efficiency, and their grain size and structure are better than seamless steel pipes. Compared with the straight seam submerged arc welded pipe (LSAW steel pipe) of the same specification, the production speed of ERW pipe is fast, and there is no local thinning of the anti-corrosion layer at the weld. Its fields of application involve casing used in oil drilling, subsea oil and gas pipelines in the offshore oil industry, oil and gas pipelines and gas distribution pipes for trunk lines and urban pipeline networks, etc.
A variety of welding defects may appear in ERW pipes, some of these defects come from the base metal, and some are generated during the welding process. Different defects have different effects on welding quality. Area-type defects such as cracks and lack of fusion are prone to stress concentration under stress conditions, which is the main cause of low-stress brittle fracture of welds. For volume defects such as pores and slag inclusions, although their cracking sensitivity is lower than that of area defects, the effective cross-sectional area of the weld is reduced and the welding strength is reduced. Under the action of external force, these defects often become the source of cracks, which eventually lead to the cracking of the weld.
Ultrasonic inspection in the production process of ERW pipe
Ultrasonic testing is currently the main non-destructive testing method in the production process of ERW pipes. Its main application areas include:
1) Ultrasonic online detection of steel plates.
The on-line detection of supersonic waves on steel plates generally uses twin-crystal or poly-crystal probes, coupled with water film or partial water immersion methods, and its main purpose is to detect layered defects in the steel plate parallel to the surface of the steel plate. There are two main scanning methods: one is parallel line scanning along the rolling direction; the other is that the steel plate moves in a straight line along the rolling direction, and the probe reciprocates perpendicular to the moving direction of the steel pipe to form a "z"-shaped scanning. Since the edge of the steel plate forms a weld seam in the subsequent ERW welding, the detection of defects at this place is particularly important in the ultrasonic testing of the steel plate. Relevant standards and specifications require 100% scanning of the edge of the steel plate. In actual work, the method of increasing the number of probes at the edge of the steel plate is generally used to ensure this.
2) ERW welding, ultrasonic on-line inspection of weld seam after internal and external burr removal.
ERW weld seam ultrasonic on-line inspection is carried out after welding and removal of internal and external burrs. It mainly includes two parts: one is to use A-scan or B-scan to detect the scraping effect of internal and external burrs. Compared with the A-scan, the B-scan can display the appearance of the inner wall of the weld after removing the internal burrs in real time, which is more intuitive; the second is the oblique incidence of the longitudinal wave, and the shear wave generated by its refraction in the welded pipe is used to detect welding defects. Since the weld seam temperature is high at this time, high-temperature probes are generally used for on-line detection, and local water immersion method is used to carry out.
3) Off-line detection and pipe end detection of ERW welds.
Off-line ultrasonic testing of ERW welds is generally carried out after hydrostatic testing and chamfering, and is mainly used to detect longitudinal defects in welds and heat-affected zones. In order to improve detection efficiency, automatic detection is generally adopted. Due to the influence of the dead zone at the pipe end in the automatic detection. Manual ultrasonic scanning of the welded tank is generally added later. The content of pipe end inspection mainly includes the detection of pipe end welds, layered defects of pipe end base metal, and axial and circumferential defects. The detection of delamination defects generally adopts split probes, and the axial and circumferential defects in welds and base metals are mostly scanned by oblique probes.

Selection of process parameters for ultrasonic testing of ERW welds.
Ultrasonic testing of ERW welds mainly includes automatic testing and manual testing.
1) Automatic detection
At present, the automatic detection of ERW welds mainly adopts two forms: wheel probe detection and partial water immersion detection. Automatic detection has the advantages of high detection efficiency and fast speed, but it is not conducive to the precise positioning of defects and qualitative and quantitative analysis
2) Manual detection
In comparison, the flexibility of manual detection is higher, not only can accurately locate defects, but also conduct qualitative and quantitative analysis of defects through echo characteristics and dynamic waveforms. For defects detected by automatic ultrasonic detection, manual methods are generally used for further confirmation.
Summarize
1) In the ultrasonic testing of ERW welded pipes, in order to ensure that pure shear waves are excited in the welded pipe, and the inner wall of the welded pipe is scanned. The lower limit of the range of the shear wave refraction angle of the welded pipe is 33.2 degrees, and the upper limit changes with the change of the inner and outer diameter ratio r/R of the welded pipe. The larger the value of r/R, the larger the range.
2) When the sound beam refraction angle of the inner wall of the welded pipe is 45 degrees, it has a high detection sensitivity for the surface opening defects of the weld seam and the heat-affected zone. However, in order to take into account the detection of radial area defects inside the weld, a shear wave acoustic beam with a large refraction angle should also be used for scanning.
3) The width of the sound beam of the shooting team should be considered comprehensively according to the refraction angle of the transverse wave and the diameter of the steel pipe. It is necessary to ensure that the upper edge of the sound beam does not excite surface waves in the welded pipe, and to avoid the occurrence of refracted longitudinal waves in the welded pipe.
A variety of welding defects may appear in ERW pipes, some of these defects come from the base metal, and some are generated during the welding process. Different defects have different effects on welding quality. Area-type defects such as cracks and lack of fusion are prone to stress concentration under stress conditions, which is the main cause of low-stress brittle fracture of welds. For volume defects such as pores and slag inclusions, although their cracking sensitivity is lower than that of area defects, the effective cross-sectional area of the weld is reduced and the welding strength is reduced. Under the action of external force, these defects often become the source of cracks, which eventually lead to the cracking of the weld.
Ultrasonic inspection in the production process of ERW pipe
Ultrasonic testing is currently the main non-destructive testing method in the production process of ERW pipes. Its main application areas include:
1) Ultrasonic online detection of steel plates.
The on-line detection of supersonic waves on steel plates generally uses twin-crystal or poly-crystal probes, coupled with water film or partial water immersion methods, and its main purpose is to detect layered defects in the steel plate parallel to the surface of the steel plate. There are two main scanning methods: one is parallel line scanning along the rolling direction; the other is that the steel plate moves in a straight line along the rolling direction, and the probe reciprocates perpendicular to the moving direction of the steel pipe to form a "z"-shaped scanning. Since the edge of the steel plate forms a weld seam in the subsequent ERW welding, the detection of defects at this place is particularly important in the ultrasonic testing of the steel plate. Relevant standards and specifications require 100% scanning of the edge of the steel plate. In actual work, the method of increasing the number of probes at the edge of the steel plate is generally used to ensure this.
2) ERW welding, ultrasonic on-line inspection of weld seam after internal and external burr removal.
ERW weld seam ultrasonic on-line inspection is carried out after welding and removal of internal and external burrs. It mainly includes two parts: one is to use A-scan or B-scan to detect the scraping effect of internal and external burrs. Compared with the A-scan, the B-scan can display the appearance of the inner wall of the weld after removing the internal burrs in real time, which is more intuitive; the second is the oblique incidence of the longitudinal wave, and the shear wave generated by its refraction in the welded pipe is used to detect welding defects. Since the weld seam temperature is high at this time, high-temperature probes are generally used for on-line detection, and local water immersion method is used to carry out.
3) Off-line detection and pipe end detection of ERW welds.
Off-line ultrasonic testing of ERW welds is generally carried out after hydrostatic testing and chamfering, and is mainly used to detect longitudinal defects in welds and heat-affected zones. In order to improve detection efficiency, automatic detection is generally adopted. Due to the influence of the dead zone at the pipe end in the automatic detection. Manual ultrasonic scanning of the welded tank is generally added later. The content of pipe end inspection mainly includes the detection of pipe end welds, layered defects of pipe end base metal, and axial and circumferential defects. The detection of delamination defects generally adopts split probes, and the axial and circumferential defects in welds and base metals are mostly scanned by oblique probes.

Selection of process parameters for ultrasonic testing of ERW welds.
Ultrasonic testing of ERW welds mainly includes automatic testing and manual testing.
1) Automatic detection
At present, the automatic detection of ERW welds mainly adopts two forms: wheel probe detection and partial water immersion detection. Automatic detection has the advantages of high detection efficiency and fast speed, but it is not conducive to the precise positioning of defects and qualitative and quantitative analysis
2) Manual detection
In comparison, the flexibility of manual detection is higher, not only can accurately locate defects, but also conduct qualitative and quantitative analysis of defects through echo characteristics and dynamic waveforms. For defects detected by automatic ultrasonic detection, manual methods are generally used for further confirmation.
Summarize
1) In the ultrasonic testing of ERW welded pipes, in order to ensure that pure shear waves are excited in the welded pipe, and the inner wall of the welded pipe is scanned. The lower limit of the range of the shear wave refraction angle of the welded pipe is 33.2 degrees, and the upper limit changes with the change of the inner and outer diameter ratio r/R of the welded pipe. The larger the value of r/R, the larger the range.
2) When the sound beam refraction angle of the inner wall of the welded pipe is 45 degrees, it has a high detection sensitivity for the surface opening defects of the weld seam and the heat-affected zone. However, in order to take into account the detection of radial area defects inside the weld, a shear wave acoustic beam with a large refraction angle should also be used for scanning.
3) The width of the sound beam of the shooting team should be considered comprehensively according to the refraction angle of the transverse wave and the diameter of the steel pipe. It is necessary to ensure that the upper edge of the sound beam does not excite surface waves in the welded pipe, and to avoid the occurrence of refracted longitudinal waves in the welded pipe.


