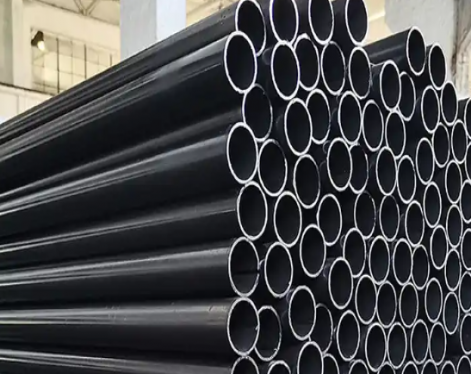
CS seamless pipe is a kind of long steel. The steel pipe has a hollow section and is widely used as a pipeline for transporting fluids, such as pipelines for transporting oil, natural gas, gas, water and certain solid materials. Compared with solid steel such as round steel, steel pipe has the same flexural and torsional strength, and is lighter in weight. It is an economical section steel and is widely used in the manufacture of structural parts and mechanical parts, such as oil drill pipes, automobile transmission shafts, bicycle racks and steel scaffolding used in building construction, etc.
Common defects of cs seamless pipe
1) Dangerous defects: cracks, inward folds, outward folds, rolling, delamination, scarring, concave pulls, convex hulls, etc.
2) General defects: pits, blue lines, scratches, bumps, slight inner and outer straights, roll marks, etc.
Cause
1) Due to surface defects or internal defects of the pipe blank.
2) Produced in the production process, such as the incorrect design of rolling process parameters, the surface of the die is not smooth, the lubrication conditions are not good, and the pass design and adjustment are unreasonable.
3) In the process of heating, rolling, heat treatment and straightening of the tube blank (steel tube), if the heating temperature is not properly controlled, the deformation is uneven, the heating and cooling speed is unreasonable or the straightening deformation is too large, resulting in excessive residual stress, Then it may also cause surface cracks in the cs seamless pipe.
CS seamless pipe quality inspection method
1. Chemical composition analysis: chemical analysis method, instrumental analysis method (infrared C-S instrument, direct reading spectrometer, zcP, etc.).
1) Infrared C-S instrument: analyze ferroalloys, steelmaking raw materials, C and S elements in steel.
2) Direct reading spectrometer: C, Si, Mn, P, S, Cr, Mo, Ni, Cn, A1, W, V, Ti, B, Nb, As, Sn, Sb, Pb, Bi
3) N-0 instrument: gas content analysis N, O
2.CS seamless pipe sizes and shape inspection
1) Steel pipe wall thickness inspection: micrometer, ultrasonic thickness gauge, no less than 8 points at both ends and record.
2) Check the outer diameter and ovality of the steel pipe: caliper, vernier caliper, ring gauge, and measure the maximum and minimum points.
3) Steel pipe length inspection: steel tape measure, manual, automatic length measurement.
4) Steel tube bending inspection: straightedge, level (1m), feeler gauge, thin wire to measure the bending degree of each meter and the bending degree of the whole length.
5) Inspection of the bevel angle and blunt edge of the steel pipe end face: square ruler, card board.
3.CS seamless pipe surface quality inspection: 100%
1) Manual visual inspection: lighting conditions, standards, experience, signs, steel pipe rotation.
2) NDT inspection
a. Ultrasonic flaw detection UT: It is more sensitive to the surface and internal crack defects of various materials with uniform materials. Standard: GB/T 5777-1996; Level: C5
b. Eddy Current ET (Electromagnetic Induction): It is mainly sensitive to point-shaped (hole-shaped) defects. Standard: GB/T 7735-2004; Level: Class B
c. Magnetic particle MT and magnetic flux leakage inspection: magnetic inspection, suitable for the detection of surface and near-surface defects of ferromagnetic materials. Standard: GB/T 12606-1999; Level: C4
d. Electromagnetic ultrasonic flaw detection: no coupling medium is required, and it can be applied to high temperature, high speed, and rough surface flaw detection of steel pipes.
e. Penetration inspection: fluorescence, coloring, detection of surface defects of steel pipes.
4.CS seamless pipe management performance inspection
1) Tensile test: measure stress and deformation, determine the strength (YS, TS) and plasticity index (A, Z) of the material. Longitudinal and transverse samples; pipe sections, arcs, round samples (¢10, ¢12.5); small diameter, thin wall, large diameter, thick wall, calibration distance.
Note: The elongation after fracture of the sample is related to the size of the sample GB/T 1760
2) Impact test: CVN, notch C type, V type, work J value J/cm2. Standard sample 10 × 10 × 55 (mm); non-standard sample 5 × 10 × 55 (mm)
3) Hardness test: Brinell hardness HB, Rockwell hardness HRC, Vickers hardness HV, etc.
4) Hydraulic test: test pressure, voltage stabilization time, p=2Sδ/D
5.CS seamless pipe process performance inspection
1) Flattening test: C-shaped sample of circular sample (S/D>0.15) H=(1+2)S/(∝+S/D), L=40~100mm, deformation coefficient per unit length=0.07 ~0.08
2) Ring pull test: L=15mm, no crack is qualified
3) Flaring and hemming test: top center taper is 30°, 40°, 60°
4) Bending test: can replace flattening test (for large diameter pipes)
6. Metallographic analysis of cs seamless pipe
1) High magnification inspection (microscopic analysis): non-metallic inclusions 100x GB/T 10561
Grain size: grade, grade difference
Organization: M, B, S, T, P, F, A-S
Decarburization layer: inner and outer
Method A Rating: Class A - Sulfide; Class B - Oxide; Class C - Silicate; D - Spherical Oxide
2) Low magnification test (macro analysis): naked eye, magnifying glass below 10x
a. Acid etching test method
b. Sulfur seal inspection method (tube blank inspection, showing low cultured tissue and defects, such as looseness, segregation, subcutaneous air bubbles, skin turning, white spots, inclusions, etc.).
c. Tower-shaped hairline inspection method: check the number, length and distribution of hairlines.


