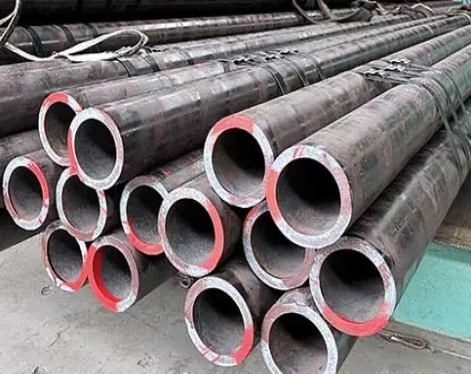
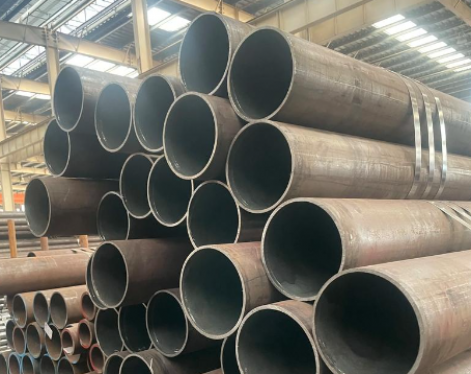
In the industrial field, boiler tubes are regarded as the "energy arteries" of industrial equipment and play an extremely critical role. It is the core component that constitutes the "veins" of the boiler. It is mainly used to manufacture the boiler's heating surface tubes, steam pipes, etc. It shoulders the task of carrying high-temperature and high-pressure media. It is widely used in thermal power, industrial boilers, central heating and other fields. Its quality and performance are directly related to energy conversion efficiency and operational safety.
Boiler tubes usually work under high temperature (up to hundreds of degrees or even higher) and high pressure (working pressure is generally above 9.8Mpa) environment. They are subjected to long-term erosion of high-temperature flue gas and water vapor, and may also face various complex working conditions such as chemical corrosion and erosion. Under such harsh conditions, the thickness of boiler tubes has a significant impact on their performance and safety. If the thickness is insufficient, it may lead to insufficient strength and be unable to withstand the pressure of the internal medium, thus causing leakage or even serious accidents such as explosion; if the thickness is too large, it will cause material waste and increased costs.
Ultrasonic detection method
1. Principle
The ultrasonic generator emits high-frequency sound waves. The propagation speed and reflection characteristics of the sound waves in the pipe wall can be used to measure the thickness of the pipe wall.
2. Operation
The ultrasonic probe is attached to the surface of the pipe, the returned sound wave signal is measured, and the wall thickness is calculated based on the propagation time and speed of the sound wave in the pipe wall.
3. Advantages
Ultrasonic detection is non-destructive, fast and accurate, and is the preferred method for detecting the wall thickness of boiler tubes. For boiler tubes made of seamless steel pipe or carbon steel pipe, ultrasonic detection can quickly locate changes in wall thickness and effectively monitor the wear of the pipe.

Radiographic detection method
1. Principle
Using the principle of X-ray or gamma ray penetrating materials, the defects inside the pipeline, such as uneven wall thickness or cracks, are judged by imaging analysis of boiler tubes.
2. Operation
Use professional equipment to irradiate the boiler tubes and obtain imaging results. The wall thickness and internal defects are judged by analyzing the imaging results.
Magnetic particle detection method
1. Principle
Applicable to surface and near-surface defect detection of ferromagnetic materials. The magnetic powder is gathered at the defect through the magnetic field, so as to visualize the defect location.
2. Operation
Spread the magnetic powder on the surface of the pipeline, and then gather the magnetic powder at the defect through the magnetic field. Observe the distribution of the magnetic powder to judge the defect location and the uniformity of the wall thickness.
3.Limitations
The magnetic particle detection method is mainly used to detect surface defects such as cracks. It has limited direct effect on wall thickness measurement, but it can indirectly judge the uniformity of wall thickness. During the inspection process, for some boiler tubes with coatings or accessories (such as valves) on the surface, surface treatment may be required first to ensure that the magnetic powder can be effectively adsorbed at the defects.
Eddy current detection method
1. Principle
Suitable for surface detection of conductive materials. The thickness change of the material can be measured by the eddy current effect.
2. Operation
The eddy current detection probe is attached to the surface of the pipe and the pipe wall thickness is measured by the eddy current effect.
3.Features
The eddy current detection method works better in the case of multi-layer pipes or coatings, but attention should be paid to the selection and calibration of the probe. For some boiler tubes with insulation or protective coatings, eddy current detection can measure the wall thickness without destroying the coating, but the appropriate probe should be selected according to the specific pipe material (such as mild steel tube) and coating characteristics.
Manual measurement method
1.Tools
Use measuring tools such as calipers and micrometers for direct physical measurement.
2. Operation
For small-scale inspections or measurements at special locations, manual measurement methods can be used for direct measurement.
3.Limitations
The manual measurement method is suitable for special situations where the pipeline is not easy to operate, but the measurement accuracy and efficiency are relatively low.
Testing Tips:
When testing boiler tube thickness, some details cannot be overlooked. It is necessary to choose the appropriate time for inspection, and try to carry out it during the boiler shutdown and maintenance period. At this time, the boiler tubes are at normal temperature and pressure, which is not only convenient for operation but also ensures the safety of the inspectors. When operating the detection instrument, be sure to ensure good contact between the instrument and the pipe wall. When using the X-ray detection method, it is necessary to strictly abide by radiation protection regulations and set up obvious warning signs to prevent unrelated personnel from accidentally entering the detection area.
At the same time, the use time and intensity of the radiation source must be controlled to reduce potential harm to the environment and personnel. For mechanical measurement methods, the accuracy of tools such as calipers and micrometers should be checked before measurement. During the measurement process, the force should be applied evenly to avoid affecting the measurement results due to excessive or light force.
Read more: Introduction to Corrosion Resistance of Boiler Tubes
Boiler tubes usually work under high temperature (up to hundreds of degrees or even higher) and high pressure (working pressure is generally above 9.8Mpa) environment. They are subjected to long-term erosion of high-temperature flue gas and water vapor, and may also face various complex working conditions such as chemical corrosion and erosion. Under such harsh conditions, the thickness of boiler tubes has a significant impact on their performance and safety. If the thickness is insufficient, it may lead to insufficient strength and be unable to withstand the pressure of the internal medium, thus causing leakage or even serious accidents such as explosion; if the thickness is too large, it will cause material waste and increased costs.
Ultrasonic detection method
1. Principle
The ultrasonic generator emits high-frequency sound waves. The propagation speed and reflection characteristics of the sound waves in the pipe wall can be used to measure the thickness of the pipe wall.
2. Operation
The ultrasonic probe is attached to the surface of the pipe, the returned sound wave signal is measured, and the wall thickness is calculated based on the propagation time and speed of the sound wave in the pipe wall.
3. Advantages
Ultrasonic detection is non-destructive, fast and accurate, and is the preferred method for detecting the wall thickness of boiler tubes. For boiler tubes made of seamless steel pipe or carbon steel pipe, ultrasonic detection can quickly locate changes in wall thickness and effectively monitor the wear of the pipe.

Radiographic detection method
1. Principle
Using the principle of X-ray or gamma ray penetrating materials, the defects inside the pipeline, such as uneven wall thickness or cracks, are judged by imaging analysis of boiler tubes.
2. Operation
Use professional equipment to irradiate the boiler tubes and obtain imaging results. The wall thickness and internal defects are judged by analyzing the imaging results.
3. Precautions
The radiographic detection method requires professional equipment and trained personnel to operate. At the same time, attention should be paid to radiation protection.Magnetic particle detection method
1. Principle
Applicable to surface and near-surface defect detection of ferromagnetic materials. The magnetic powder is gathered at the defect through the magnetic field, so as to visualize the defect location.
2. Operation
Spread the magnetic powder on the surface of the pipeline, and then gather the magnetic powder at the defect through the magnetic field. Observe the distribution of the magnetic powder to judge the defect location and the uniformity of the wall thickness.
3.Limitations
The magnetic particle detection method is mainly used to detect surface defects such as cracks. It has limited direct effect on wall thickness measurement, but it can indirectly judge the uniformity of wall thickness. During the inspection process, for some boiler tubes with coatings or accessories (such as valves) on the surface, surface treatment may be required first to ensure that the magnetic powder can be effectively adsorbed at the defects.
Eddy current detection method
1. Principle
Suitable for surface detection of conductive materials. The thickness change of the material can be measured by the eddy current effect.
2. Operation
The eddy current detection probe is attached to the surface of the pipe and the pipe wall thickness is measured by the eddy current effect.
3.Features
The eddy current detection method works better in the case of multi-layer pipes or coatings, but attention should be paid to the selection and calibration of the probe. For some boiler tubes with insulation or protective coatings, eddy current detection can measure the wall thickness without destroying the coating, but the appropriate probe should be selected according to the specific pipe material (such as mild steel tube) and coating characteristics.
Manual measurement method
1.Tools
Use measuring tools such as calipers and micrometers for direct physical measurement.
2. Operation
For small-scale inspections or measurements at special locations, manual measurement methods can be used for direct measurement.
3.Limitations
The manual measurement method is suitable for special situations where the pipeline is not easy to operate, but the measurement accuracy and efficiency are relatively low.
Testing Tips:
When testing boiler tube thickness, some details cannot be overlooked. It is necessary to choose the appropriate time for inspection, and try to carry out it during the boiler shutdown and maintenance period. At this time, the boiler tubes are at normal temperature and pressure, which is not only convenient for operation but also ensures the safety of the inspectors. When operating the detection instrument, be sure to ensure good contact between the instrument and the pipe wall. When using the X-ray detection method, it is necessary to strictly abide by radiation protection regulations and set up obvious warning signs to prevent unrelated personnel from accidentally entering the detection area.
At the same time, the use time and intensity of the radiation source must be controlled to reduce potential harm to the environment and personnel. For mechanical measurement methods, the accuracy of tools such as calipers and micrometers should be checked before measurement. During the measurement process, the force should be applied evenly to avoid affecting the measurement results due to excessive or light force.
Read more: Introduction to Corrosion Resistance of Boiler Tubes


